This post is part of a series about new features in Parallels Desktop 16.
Deploying a virtual machine (VM) can be cumbersome for two reasons:
- It can be pretty large—sometimes 100s of gigabytes.
- It is in a Macintosh-only file format.
The new feature, “Prepare for Transfer”, addresses both of these concerns, and it is a feature in the Parallels Desktop Pro Edition and Parallels Desktop Business Edition.
First, let’s talk about size. Even if there is room, most VMs can’t be copied to USB thumb drives because the size of the VM is too large for the way in which most thumb drives are formatted. In the case of the thumb drive in Figure 1, it was formatted in FAT32 (MS-DOS) so that it could be used with both a Mac and a PC.

The maximum file size for FAT32 is 4GB, and the VM I attempted to move is more than 9GB in size.
I did I quick survey of the VM sizes on my Macs. The smallest is 9.39GB; the largest is 262GB; and the average seems to be around 30-40GB. Moving a 90GB VM from one hard drive to another takes about 130 minutes; moving to an SSD takes about 50 minutes; and I don’t even want to think about moving a 90GB VM to Dropbox or OneDrive, but I suspect it would take more than 20 hours.
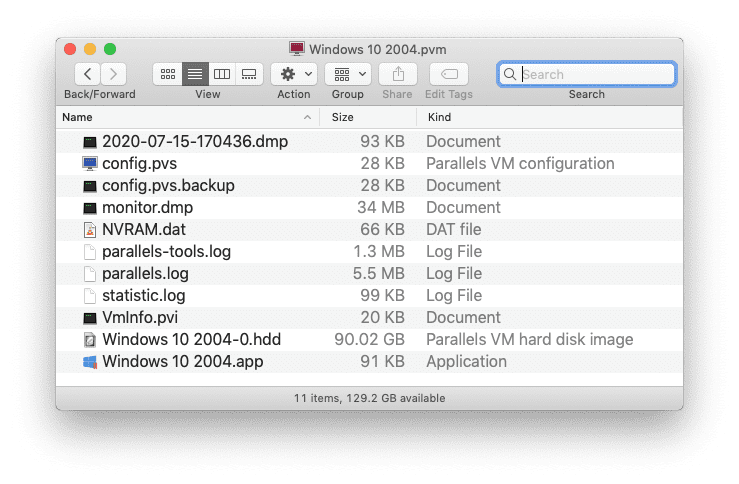
And, there is the issue of file format. Parallels Desktop VMs are stored as Mac packages. A package is basically a folder masquerading as a single file. You can force the Finder to show you the inside of a package, and Figure 2 shows the inside of one of my VMs.

Packages are only supported on the Mac or an iOS device, so cloud storage systems aren’t really equipped to deal with packages, but they do the best they can.
A Parallels Desktop power user, and especially an IT Admin who manages the Parallels Desktop deployments inside a company, often need to move VMs around and generally use non-Apple file servers and other devices. For this reason, IT Admins told us that help in moving/deploying VMs is high on the list of requested improvements for Parallels Desktop. This was the motivation behind the new “Prepare for Transfer” feature in Parallels Desktop 16, which compresses the VM and converts it to a single zip file that any system can handle.
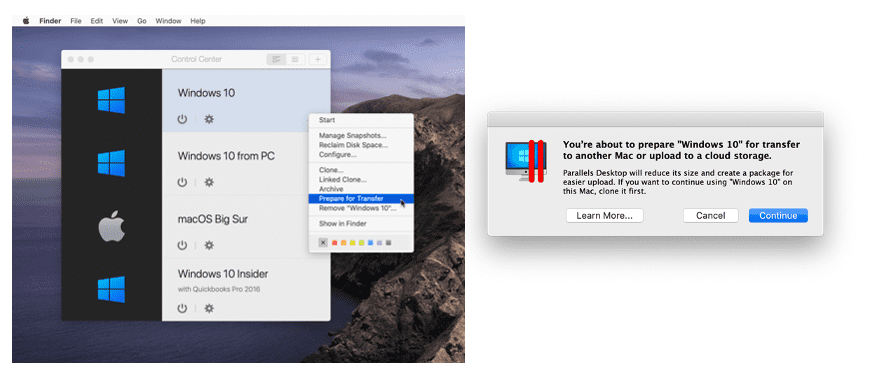
A Pro or Business Edition user just has to right-click on a VM in the Control Center to access this new feature, as seen in Figure 3. Choosing this menu command presents the dialog also shown in Figure 3.

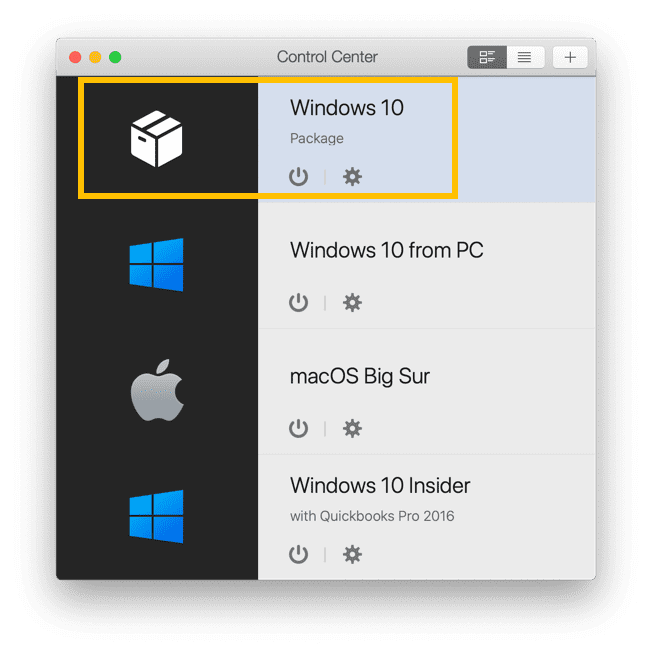
When the compression and conversion is finished, the VM appears in the Control Center as a “package”, as shown in Figure 4.

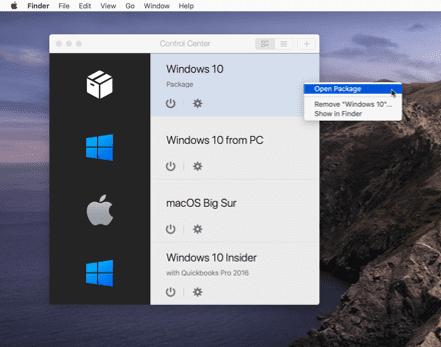
A single menu command will decompress this package into an ordinary VM, as shown in Figure 5.

So, how long does it take to compress and decompress a VM, and what compression savings does it achieve? While the CPU speed on the Mac and the speed of the disk drive or SSD are factors, the only remaining important variable is the size of the VM. I took some quick measurements on my MacBook Pro to give you some idea of the time involved, and they are shown in Table 1.
| OS | VM size (GBs) | Compressed size (GB) | Compression Time | Decompression Time |
| Windows 10 | 10 GB | 5 GB | 1 minutes, 5 seconds |
21 seconds |
| Ubuntu | 11 GB | 5 GB | 1 minute, 26 seconds |
24 seconds |
| macOS Big Sur | 31 GB | 23 GB | 4 minutes, 15 seconds |
1 minute, 19 seconds |
| Windows 10 Insider Preview | 262 GB | 200 GB | 38 minutes, 31 Seconds |
11 minutes, 52 seconds |
I hope this gives you a useful overview of this new feature in Parallels Desktop 16. Let us know in the comments how this feature is working for you.
Feel free to test Parallels Desktop 16 for Mac for 14 days for free.
The post New in Parallels Desktop 16 – “Prepare for Transfer” appeared first on Parallels Blog.